Anyone who has worked with a Java-based project has noticed the tendency of build systems like Maven and Gradle to seemingly “download the Internet” during compilation. The effect is magnified if your workflow uses containers because build artifacts are, by definition, removed after the build process completes. Developers get tired of this waste of time and resources quickly.
I recently learned how to use JFrog Artifactory to cache Java build artifacts locally, speeding up my frequent Maven builds and saving network bandwidth. The same tactic could be adopted to other build systems.
Artifactory in Docker
The easiest way to get started with Artifactory is to spin up an instance in Docker. I recommend creating a Docker volume before running the Artifactory image so that your artifact cache persists after you remove the container, for example if JFrog publishes an updated image and you want to pull the new version — you know, for security, bug, and performance fixes.
$ docker pull docker.bintray.io/jfrog/artifactory-oss:latest
$ docker volume create --name artifactory5_data
$ docker run --name artifactory -d \
         -v artifactory5_data:/var/opt/jfrog/artifactory \
         -p 8081:8081 docker.bintray.io/jfrog/artifactory-oss:latest
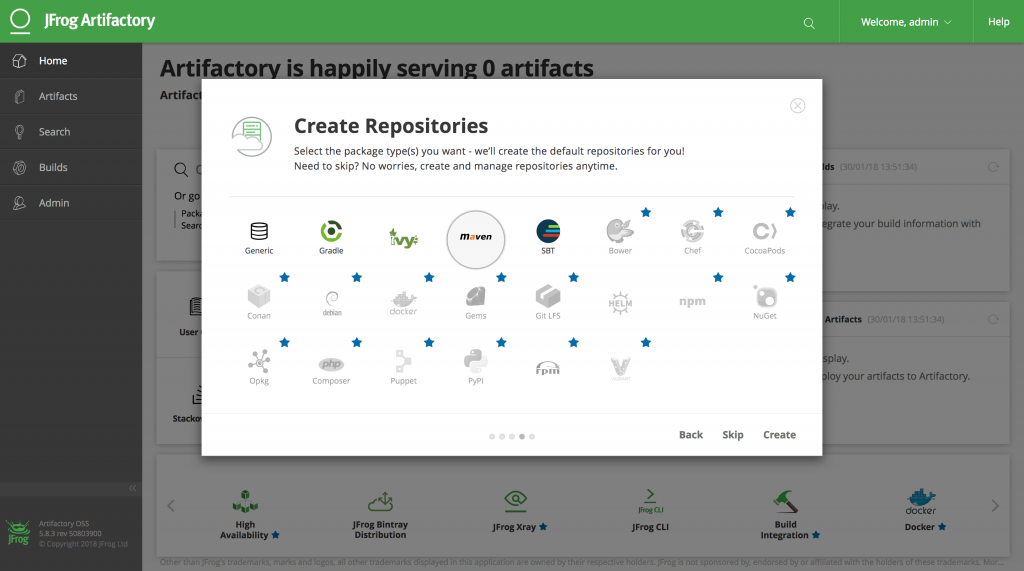
Assuming the container has started up correctly you should now be able to access the Artifactory web application at http://localhost:8081. The first time you access it you will be asked to set a password for the administrator account and to create repositories appropriate for your desired build system. In this case you should at least select Maven:

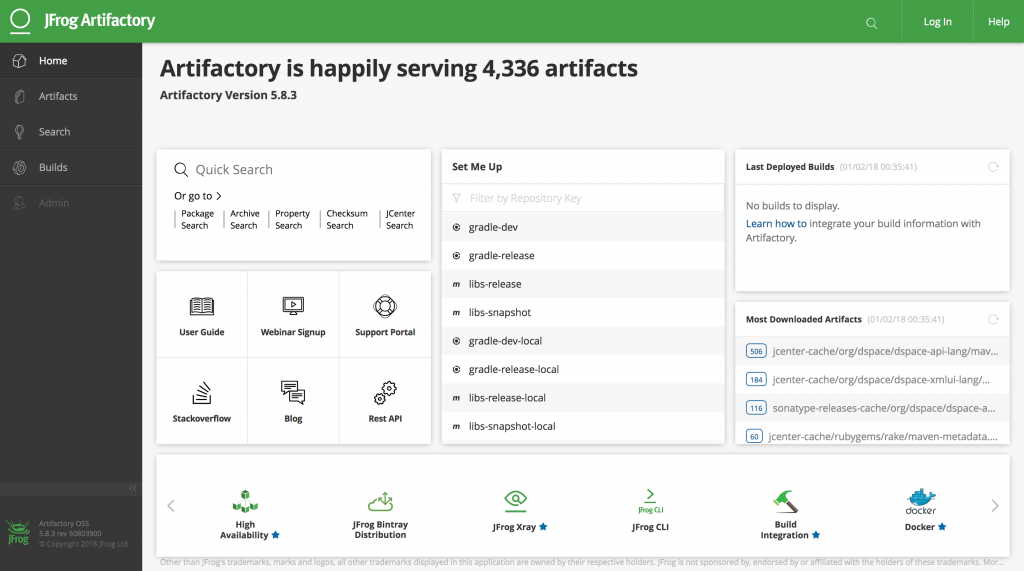
By default Artifactory sets up a “virtual” repository called libs-release that is configured to transparently proxy and cache release and snapshot artifacts from Maven central. This should probably cover most of your project’s build artifacts — or at least enough to verify that it’s working. Later, once you understand how Artifactory works, you can add more remote repositories and include them in the default virtual repository (check your project’s pom.xml for other <repository> blocks). For example, I’ve added restlet, rubygems-release, and sonatype-releases as well.
Configure Maven Settings
Artifactory’s web interface has a neat “Set Me Up” utility that will generate a Maven settings file for you, but I find it a bit confusing because it caters for use cases like publishing artifacts to the repository. As we only need anonymous read-only access for now, it’s much easier to just use the snippet below as a starting point instead.
Copy this to ~/.m2/settings.xml:
<?xml version="1.0" encoding="UTF-8"?>
<settings xsi:schemaLocation="http://maven.apache.org/SETTINGS/1.1.0 http://maven.apache.org/xsd/settings-1.1.0.xsd" xmlns="http://maven.apache.org/SETTINGS/1.1.0"
    xmlns:xsi="http://www.w3.org/2001/XMLSchema-instance">
  <servers>
    <server>
      <id>central</id>
    </server>
    <server>
      <id>snapshots</id>
    </server>
  </servers>
  <profiles>
    <profile>
      <repositories>
        <repository>
          <snapshots>
            <enabled>false</enabled>
          </snapshots>
          <id>central</id>
          <name>libs-release</name>
          <url>http://localhost:8081/artifactory/libs-release</url>
        </repository>
        <repository>
          <snapshots />
          <id>snapshots</id>
          <name>libs-snapshot</name>
          <url>http://localhost:8081/artifactory/libs-snapshot</url>
        </repository>
      </repositories>
      <pluginRepositories>
        <pluginRepository>
          <snapshots>
            <enabled>false</enabled>
          </snapshots>
          <id>central</id>
          <name>libs-release</name>
          <url>http://localhost:8081/artifactory/libs-release</url>
        </pluginRepository>
        <pluginRepository>
          <snapshots />
          <id>snapshots</id>
          <name>libs-snapshot</name>
          <url>http://localhost:8081/artifactory/libs-snapshot</url>
        </pluginRepository>
      </pluginRepositories>
      <id>artifactory</id>
    </profile>
  </profiles>
  <activeProfiles>
    <activeProfile>artifactory</activeProfile>
  </activeProfiles>
</settings>
Now when you run mvn package you should see Maven contact your local repository instead of a remote one. If Maven requests an artifact that doesn’t exist in the cache yet, Artifactory will go fetch it and then send it to you. The next time Maven requests that artifact it will already be in the cache and will be retrieved much quicker.
Eventually your Artifactory will be filled with artifacts — the administration dashboard will even give you statistics!

Advanced Usage: Docker Networking
Maven builds in your normal working environment actually already populate an artifact cache located at ~/.m2/repository, so after one or two builds you won’t really benefit from the Artifactory cache at all. The real benefit to hosting your own artifact repository locally — and the driver behind this post — is using its cache in a container-based workflow. The Docker image building process is one particularly painful part of this workflow because images generally start with a clean build environment by design, and therefore any Maven packaging steps will “download the Internet” again every time you rebuild the image.
To use your Artifactory cache with other Docker containers they must all be on the same user-defined network because Docker’s default network configuration does not allow containers to talk to each other. You will have to destroy the Artifactory container you created earlier, create a new network, and then re-create the container to use this network — you did create a volume for your data earlier, right?
$ docker rm -f artifactory
$ docker network create maven-build
$ docker run --name artifactory -d \
         --network maven-build \
         -v artifactory5_data:/var/opt/jfrog/artifactory \
         -p 8081:8081 docker.bintray.io/jfrog/artifactory-oss:latest
Now, any other container using this network will be able to look up the Artifactory container by name and access its repository cache. You can utilize this in the building of Docker images by replacing “localhost” with the name of your Artifactory container in settings.xml and copying it to your image in its Dockerfile. For example:
...
RUN mkdir -p /root/.m2

COPY settings.xml /root/.m2/settings.xml

RUN mvn package
...
When you build the container you need to specify the network you created above and then your build will take advantage of the local Artifactory cache:
$ docker build --network maven-build -f Dockerfile -t dspace .I’ve found that this greatly reduces the time and resources required to adopt a container-based workflow for Java projects, therefore making these projects almost bearable to work with again. 😉